I have my own website (this site!), using GitHub and Jekyll. Originally, I just linked to my Medium articles from my website, but this is not good practice — no one wants to enter a website and see a bunch of links.
As Medium does not yet support my country in the Partner program, I don’t lose money by posting the same article on my site. But copying manually is tedious and boring.
So here is how to copy the article into Markdown in VSCode, using some handy shortcuts.
Tip: best to copy the article when writing it to Medium, not too much later.
Step 1: Basic Medium to Markdown
Mala Deep wrote an excellent article on the subject, introducing the awesome StackEdit. This converts almost everything, using simple copy-paste.
StackEdit is awesome.
Step 2: Pictures
StackEdit uses the pictures from Medium, so they will look like this:
https://miro.medium.com/v2/resize:fit:700/1*CiGddF4WG57v-QAbrHCVnw.png
This isn’t what you want in your site — your images are yours, and you have them somewhere. Note Tip 1 above — I personally have a terrible time finding my images a few months later, but within a few days this isn’t a problem (of course, you can simply download them from Medium, but if you have a lot of images this is tiresome).
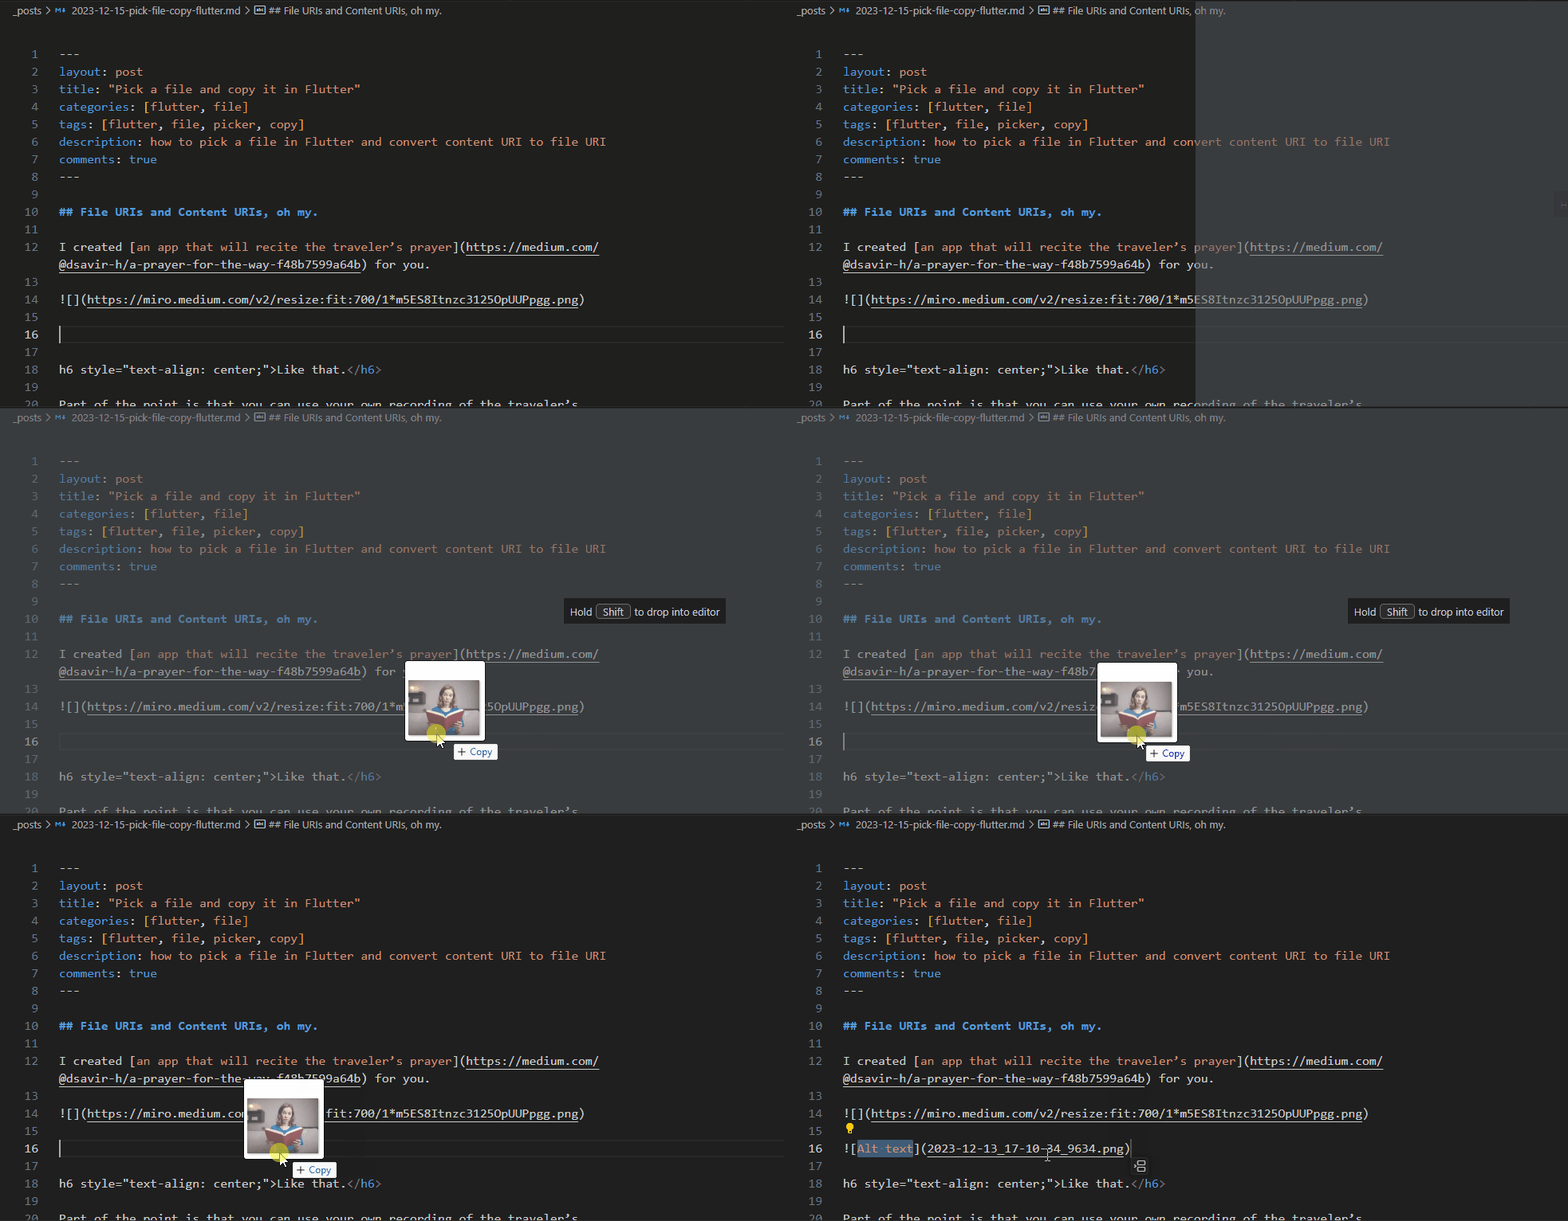
Drag and drop your image into your Markdown document. Hold Shift to drop it into the document instead of opening the file.

Don’t forget `Shift`
This will add the image to the _posts folder. If you’re like me and prefer to put it in another folder, then first drag it into that folder, and then drag it into your post in the same way, pressing Shift. In this case, you need to modify the path from ../path-to-file to /path-to-file, otherwise it won’t be found in your blog post.
Remove the previous image (with the Medium link) and edit the Alt-text if you like.
Step 2: Image captions
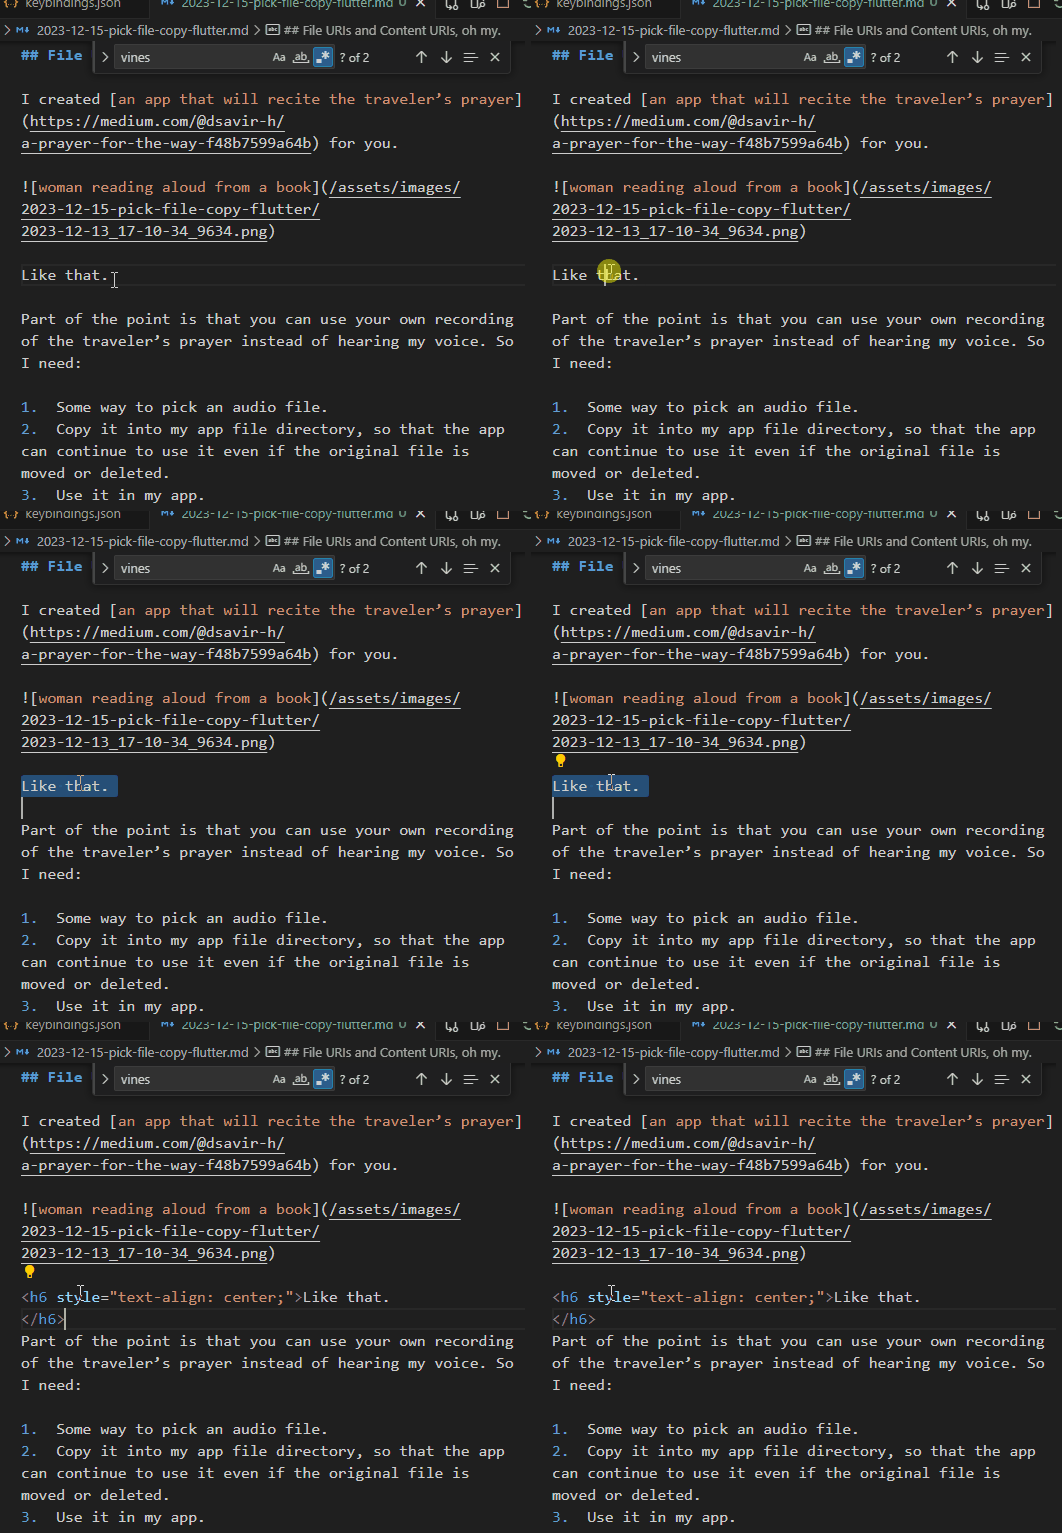
Markdown and captions is a long, convoluted story. My solution, and feel free to use a different one, is to simply have an h6 header centered below the image.
This means wrapping the caption Like that with HTML tags, turning it into
<h6 style="text-align: center;">Like that.</h6>
Doing that for all captions gets old very quickly, and this is where VSCode magic comes in: Key bindings. This allows you to create your own shortcut keys that wrap or add text with whatever you want.
- Press F1 to open the command palette
- Start typing
Preferencesand choosePreferences: open keyboard shortcuts (JSON) - In between the square brackets, insert the following code:
{
  "key": "alt+p",
  "command": "editor.action.insertSnippet",
  "when": "editorTextFocus",
  "args": {
    "snippet": "<h6 style=\"text-align: center;\">${TM_SELECTED_TEXT}</h6>"
  }
}
What did we do here?
We defined a shortcut key (alt + p) that inserts a snippet when editing. The snippet wraps the SELECTED_TEXT with <h6 style=\”text-align: center;\”> before the selected text, and </h6> after. Exactly what we wanted, by pressing two keys!

See? Like that.
And now our image and caption look good:

The image with the caption. This is another caption. and so on ad infinitum.
Tip: Create your own VSCode keybindings, with whatever style and tasks you need
Step 3: Gifs
If you theme supports responsive embedding, you’re in luck. In my theme, responsive embedding (only for iframes, therefore only for Giphy looks like this:
{ % include responsive-embed url="<url-here>" ratio="16:9" %}
Otherwise, you need to go to whatever gifs you used, and instead of copying the link (for Medium) you need to copy the embed code.
Step 4: Code blocks
The same problem arises with code. StackEdit doesn’t wrap it in code blocks. What I want is to select all the code, and then press something that will put ` dart` before and ` ` after.
Wait, we did something similar, didn’t we…?
{
  "key": "alt+d",
  "command": "editor.action.insertSnippet",
  "when": "editorTextFocus",
  "args": {
    "snippet": "```dart\n${TM_SELECTED_TEXT}\n```"
  }
}
Note the usage of \n for a new line within the snippet.
And now we can easily wrap our code blocks.
Step 5: Text separators
Medium has that nice text separator:

I created my own text separator from my vines sketch, and I created a VSCode snippet to add this as well:
{
"key": "alt+v",
"command": "editor.action.insertSnippet",
"when": "editorTextFocus",
"args": {
"snippet": "{: .align-center}"
}
},
Note that also includes liquid for center alignment {: .align-center}. This is part of my theme. Also, we don’t need the SELECTED_TEXT token, as this adds text, it doesn’t wrap selected text.
You can see the separator at the bottom of this post.
Edited: after feedback on this article, it is much easier to add a css separator:
in the css file of your site, only once:
hr {
  border: 0;
  height: 50px;
  background: url("/assets/images/vines-separator-smaller.png") no-repeat center;
}
And in the post:
<hr />
And you’re done :).
Step 6: Centering
If you have narrow images, you will notice that the images aren’t centered by default. So I created a snippet that only adds the liquid centering command, to add to my images:
{
 "key": "alt+c",
 "command": "editor.action.insertSnippet",
 "when": "editorTextFocus",
 "args": {
 "snippet": "{: .align-center}"
    }
},
Step 7: Extracts
In Jekyll, the first paragraph of each post is automatically taken as an extract on the home page. You can play with that using some HTML comment, typically <! — more -->. So I created another snippet for that:
{
 "key": "alt+m",
 "command": "editor.action.insertSnippet",
 "when": "editorTextFocus",
 "args": {
 "snippet": "<!--more-->"
    }
},
And voilà, your markdown post is ready :)
While this is still tedious and boring, VSCode makes it much easier than it would be otherwise.
What tricks do you use? Do you already use keybindings? Let me know in the comments.
104 unimaginable days. #BringThemHomeNow.
Check out my free and open source online game Space Short. If you like my site, you can also buy me a coffee.
